
Place the clean ring from your springform pan onto a serving plate. If desired, line the inside edges of the springform pan with a wide strip of parchment paper. This will make it easier to remove the pan after assembling and chilling your Karpatka.
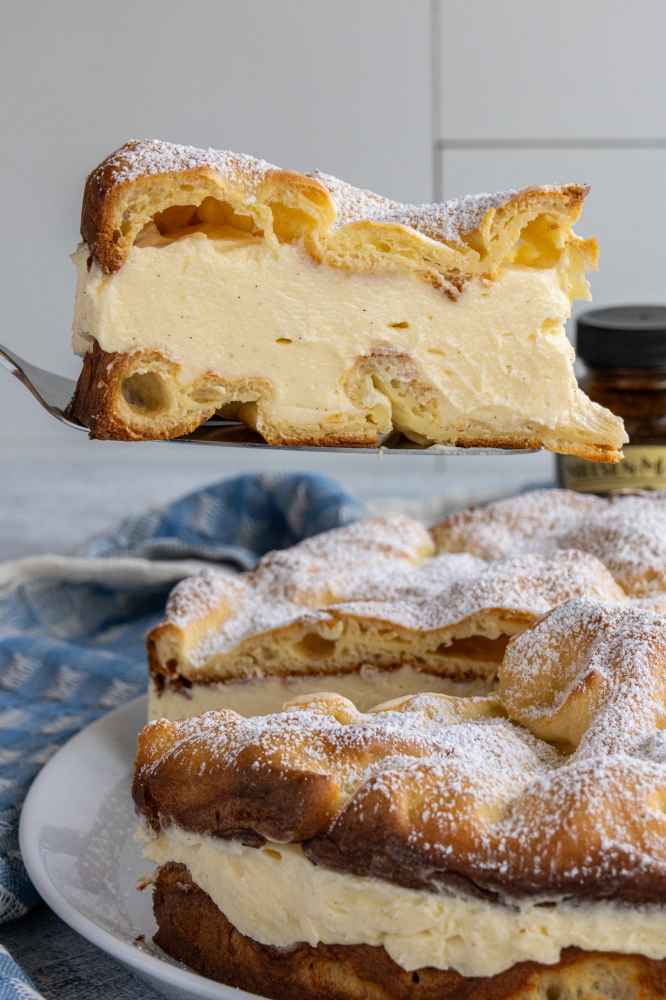
Place one of the two choux pastry layers (ideally the one that is less puffed up) inside the ring. Spread the vanilla custard over the top evenly. Top with the remaining layer of choux pastry.

Refrigerate Karpatka for at least 1 hour but up to 3 hours to allow the filling to set. Remove the ring, peel off the parchment paper, and dust the top with powdered sugar before serving.
Please scroll to the bottom of the post for the full recipe (in a printable recipe card) including ingredient amounts and detailed instructions.

EXPERT TIPS
As always, I recommend using a digital scale for the most accurate results, especially when baking. That being said, I have included volume measurements in this Karpatka recipe just in case.
Pâte à choux can be made with water, milk, or a combination. Using water results in a crisper and lighter choux pastry, and also helps prevent overbrowning. Meanwhile, using milk yields a softer, more tender shell which also browns more quickly. To provide the best structure for this cake, I recommend using a water-based choux pastry for the layers.
Part of the magic of choux pastry is how it puffs and creates a hollow pastry shell (how else would you fill eclairs and cream puffs!). The reason it works is that you must bake pâte à choux at a high temperature. This creates steam which rapidly expands the pastry and allows it to puff. Once it’s fully baked, the pastry will set and be able to support its own structure (and any fillings you choose to add).
If you don’t have a stand mixer or a hand mixer, you still can make Karpatka. For the pâte à choux, use a wooden spoon to vigorously mix the eggs into the dough. For the crème mousseline, whisk very vigorously by hand. Neither of these options sounds like fun, and will require quite a bit of elbow grease. That being said, if you enjoy baking, having a mixer (stand or hand-held) is an invaluable kitchen essential in my opinion.
Note that if your springform pans have a dark nonstick finish like mine, the edges of your choux pastry layers will brown more. The pastry isn’t burned, just darker where it met the pan. The finished Karpatka is absolutely sublime!

STORAGE AND MAKE AHEAD TIPS
Store leftover Karpatka in the fridge for up to 3 days. Note that the longer you store it, the softer it will become so it’s best to eat it as fresh as possible.
You cannot freeze fully assembled Karpatka. You can, however, freeze the baked choux pastry layers wrapped in plastic wrap and foil for up to 1 month. Thaw them overnight in the fridge and then refresh them in a 350°F (180°C) oven for about 8 to 10 minutes. Make the filling from scratch and assemble as directed.
FAQS
If your pastry cream is lumpy, it’s possible you scrambled some of the egg in the process. Simply pass your custard through a fine mesh sieve or strainer and then use only the smooth custard, discarding any lumps left in the strainer.
Egg whites freeze really well! If you don’t have a plan to use them right away, freeze the egg whites individually (you could use ice cube trays or small freezer safe bowls) and then pop them out once they are frozen. Store the frozen egg whites in a freezer bag until ready to use, then thaw however many you need in the refrigerator.

========================================================
Equipment
- 2 9-inch round springform pans (or reuse the same pan twice)
Ingredients
Crème Pâtissière (First Step of Custard Filling):
- 2 ½ cups milk
- 150 grams (¾ cup) granulated sugar
- ½ teaspoon kosher salt
- 50 grams (5 tablespoons) cornstarch
- 4 large egg yolks
- 2 teaspoons pure vanilla extract or vanilla bean paste
Pâte à Choux (Choux Pastry):
- ¾ cup water
- 85 grams (6 tablespoons) unsalted butter at room temperature
- ¼ teaspoon kosher salt
- 95 grams (¾ cup) all-purpose flour
- 3 large eggs
Crème Mousseline (To Finish Custard Filling):
- 200 grams (14 tablespoons) unsalted butter at room temperature
- 25 grams (2 tablespoons) granulated sugar
Assembly and Finishing:
- Butter for greasing pan
- Confectioners’ (powdered) sugar for topping
Instructions
Crème Pâtissière (First Step of Custard Filling):
-
Place the milk, about half the sugar, and the salt into a saucepan and heat over medium heat until simmering but not boiling.
-
Meanwhile, in a heat-proof mixing bowl whisk together the remaining sugar and cornstarch and then stir or whisk in the egg yolks until smooth. It will be fairly thick.
-
Once the milk is simmering, remove from the heat and then very gradually whisk in about ½ cup of it to the egg yolk mixture. Whisk vigorously to temper the eggs so they don’t scramble. Pour the egg mixture back into a saucepan with the remaining milk.
-
Return the saucepan to medium-low heat and continue whisking the mixture until it thickens, about 5 to 9 minutes. Don’t stop whisking or it can get lumpy and curdle.
-
Remove from the heat and whisk in the vanilla.
-
Transfer the mixture to a large shallow container. The larger surface area will help it cool faster. Cover with plastic wrap so the plastic is pressed against the surface of the custard (to prevent a skin from forming). Cool to room temperature. The custard needs to be at room temperature (not cold) for the later steps.
Pâte à Choux (Choux Pastry):
-
Preheat the oven to 400°F (200°C) with the rack in the center. Grease the bottom and sides of two 9-inch springform pans with butter and line the bottoms with parchment paper circles. The butter on the bottom will help the paper stick to the pan and make it easier to spread the dough without the paper moving around. (If you only have one springform pan you will need to bake one layer first and then prep the same pan again to bake the second layer afterwards).
-
Add the water, butter, and salt to a medium saucepan over medium heat. Once the butter has melted, remove the pan from the heat and stir in the flour all at once. This helps to prevent clumps from forming in the paste.
-
Reduce the heat to medium-low and return the pan to the heat. Stirring constantly, continue to cook until the dough forms a ball and leaves a white residue on the bottom. (The cook time will vary depending on the pan you use, heat of your stovetop, etc. For some people it may only take a couple minutes, but it took me closer to 10 minutes to ensure the dough was really coming together nicely and forming a film on the bottom–look for the visual queues rather than relying on the timing).
-
Transfer the dough to the bowl of an electric stand mixer fitted with the paddle attachment. Let the mixture cool for about 10 minutes. It should still be quite warm. With the mixer running, add one egg at a time until fully incorporated. The resulting batter should be smooth and glossy. You’ll know it has the correct consistency when the batter falls from the paddle in the shape of a long V.
-
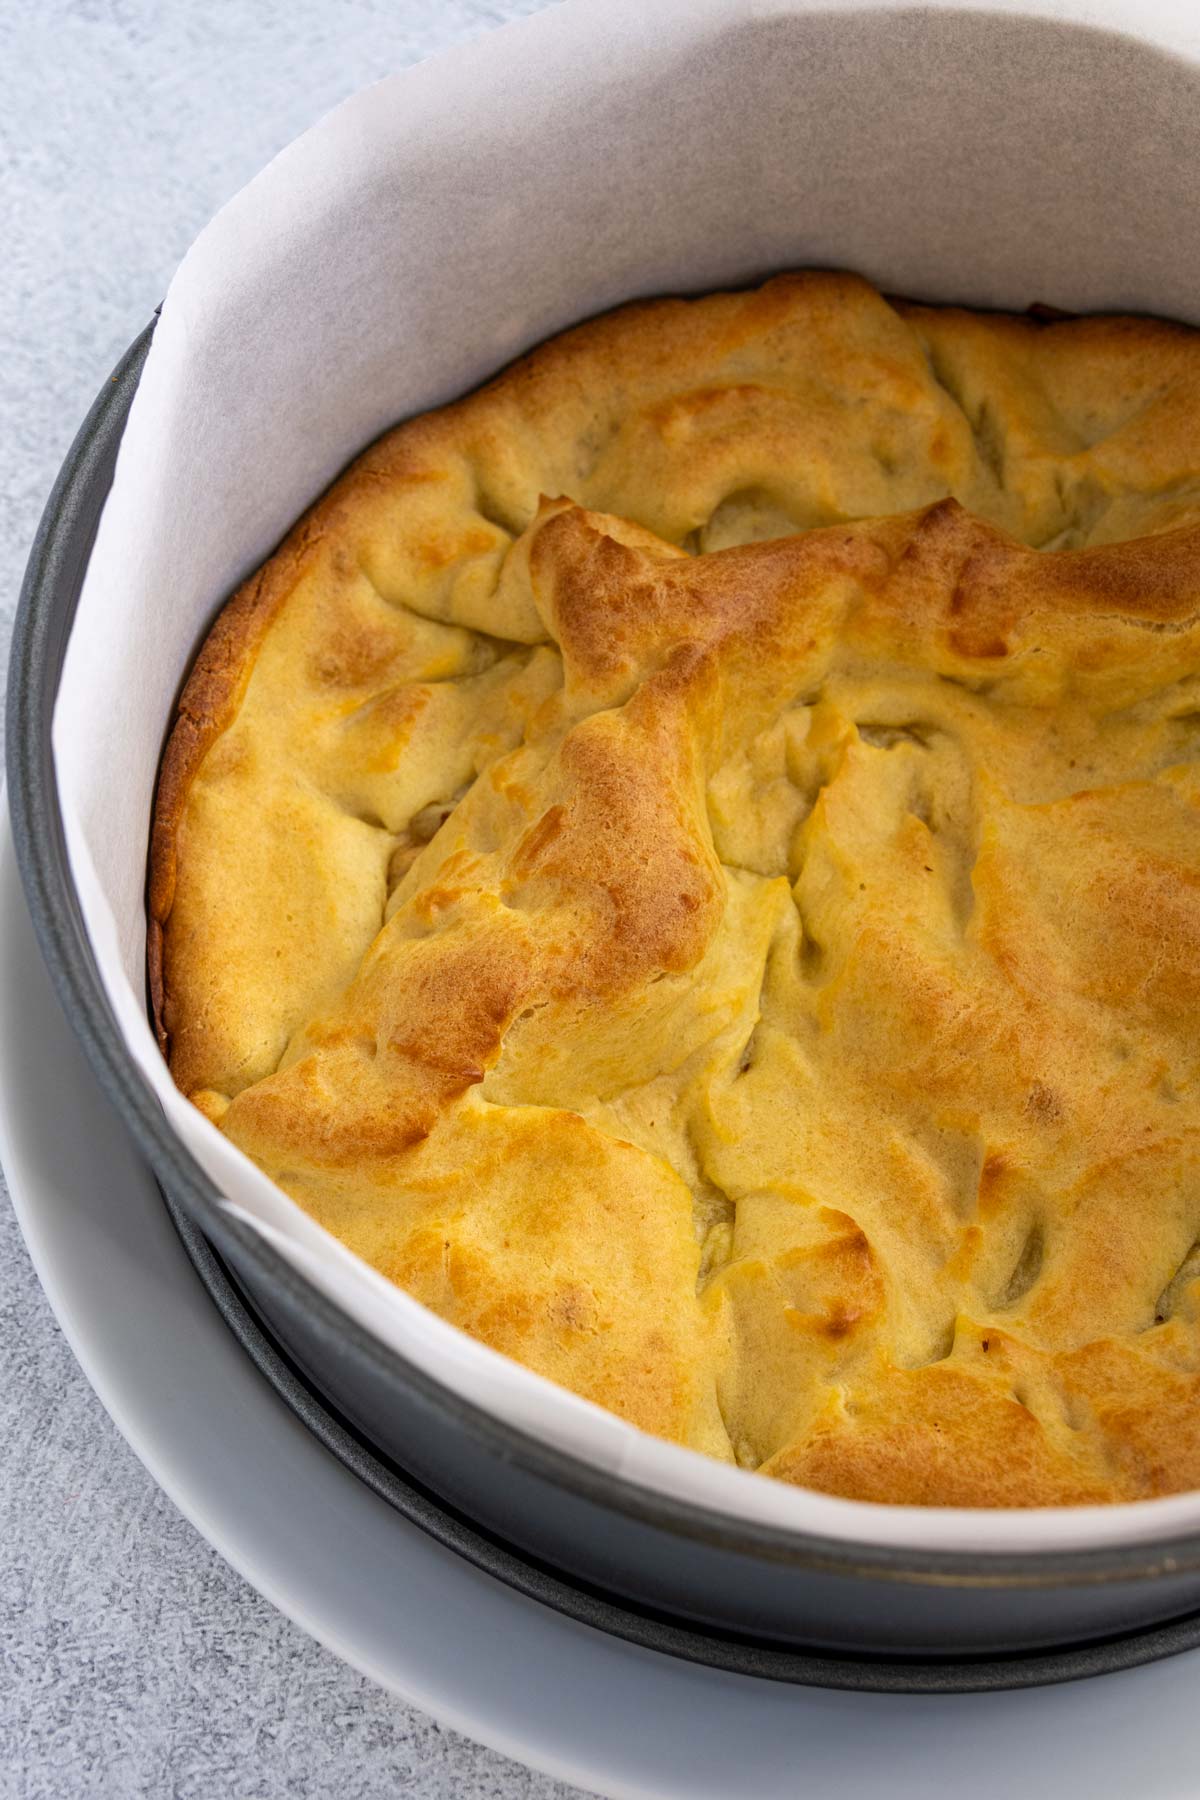
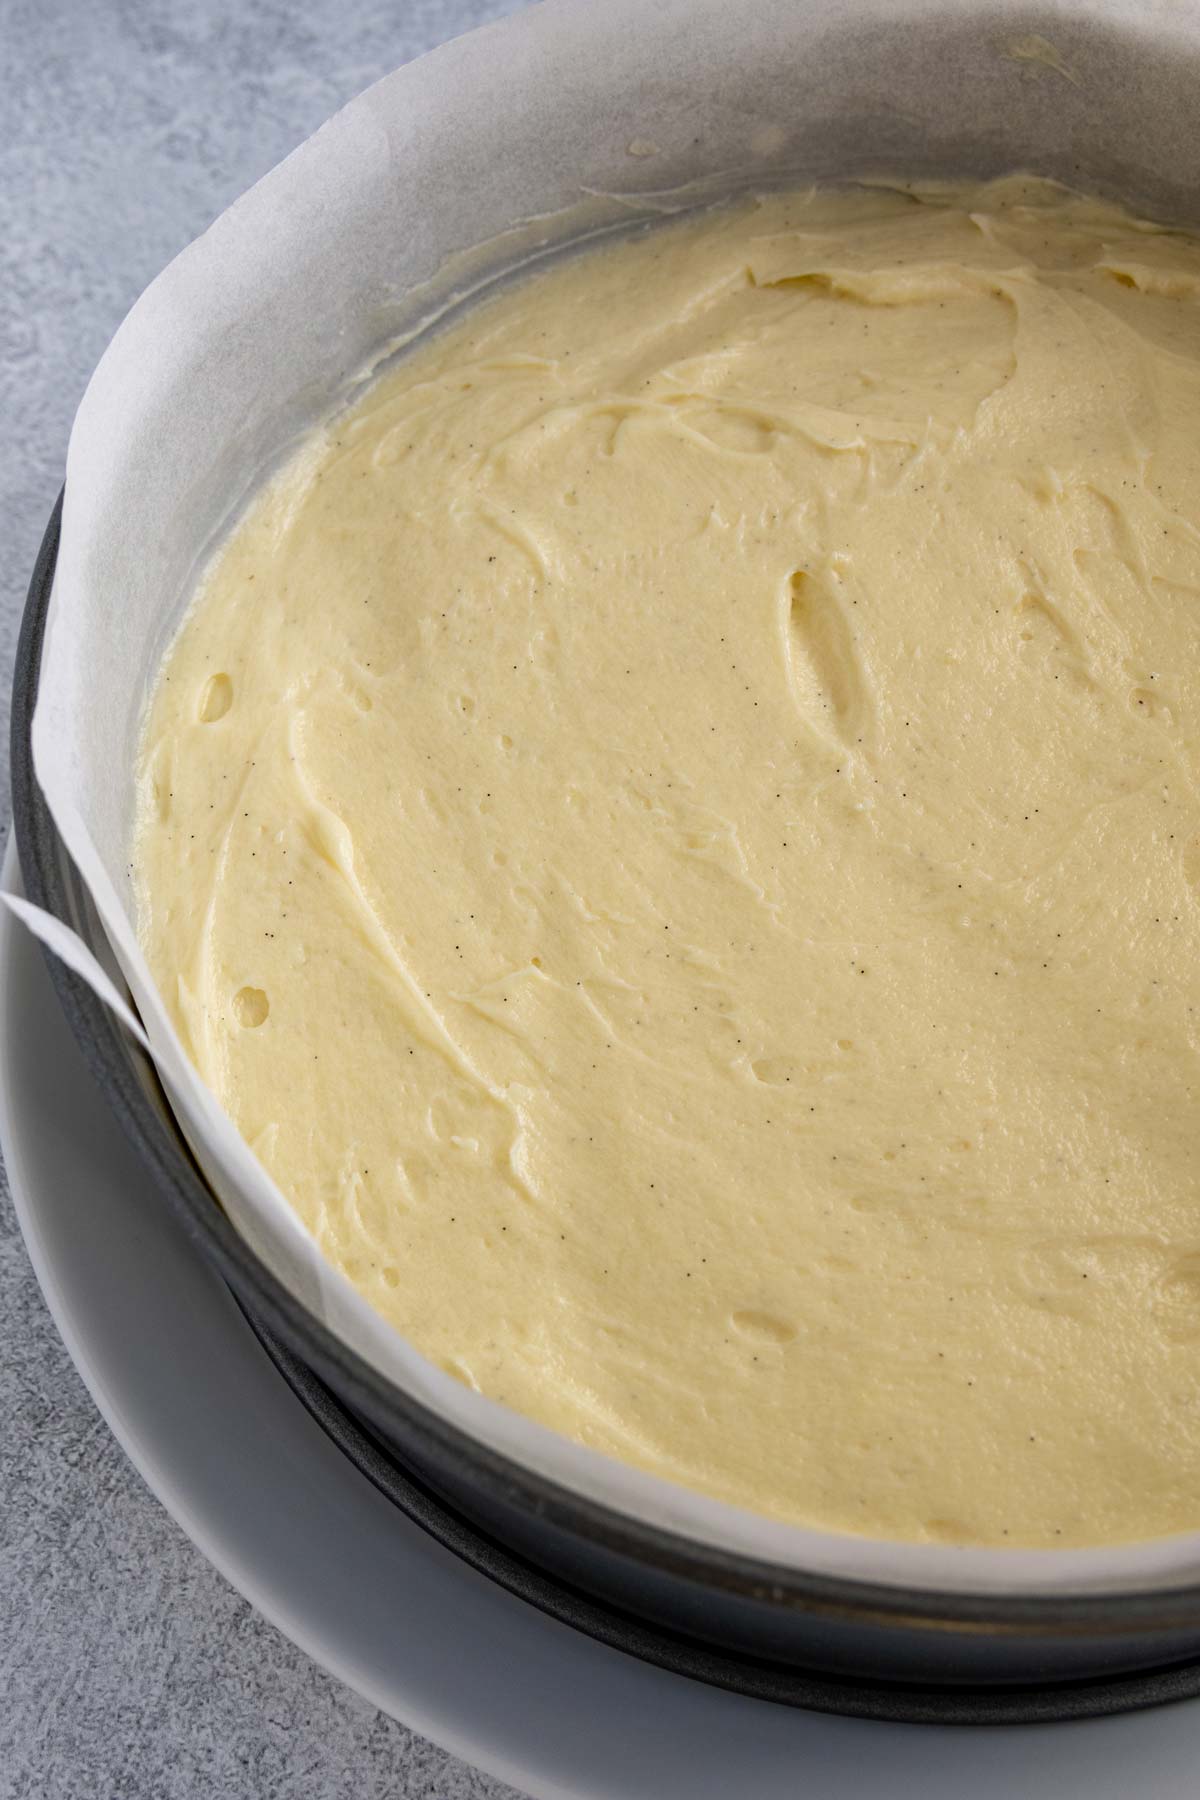
Divide the dough between the prepared pans (or if you plan to reuse the same pan twice, add half the batter to the pan and set aside the remaining half until later–I had 420 grams of batter and put 210 grams into each pan). Spread the tops of the dough unevenly using the back of a spoon to create some peaks and divots. The look is meant to represent the Carpathian Mountains.
-
Bake for about 24 to 28 minutes until it’s puffed and evenly golden brown across the top. Remove from the oven and cool for 10 minutes in the pans. Then remove from the pans and cool completely on a wire rack. Repeat the process if using only one springform.
Crème Mousseline (To Finish Custard Filling):
-
Note: Make sure your butter and pastry cream are about the same temperature before starting. You can even use a digital thermometer to check. They should both be at room temperature (around 70 to 75°F).
-
In the bowl of a stand mixer fitted with the whisk attachment, beat together the soft room temperature butter and sugar until pale and fluffy, a couple minutes.
-
Beat the crème pâtissière in its own bowl just to loosen it up and make sure it’s nice and smooth without any lumps. Then, with the mixer running on medium-low speed, gradually add the crème pâtissière to the butter mixture a couple of spoonfuls at a time. Keep mixing in the pastry cream a little at a time until it’s all incorporated. Continue beating until the mixture is light and fluffy, about 5 minutes.
-
If the cakes haven’t finished cooling at this point, press a piece of plastic wrap against the surface of the crème mousseline and set it aside at room temperature until you’re ready to assemble.
Assembly:
-
Place the clean ring from your springform pan onto a serving plate. If desired, line the inside edges of the springform pan with a wide strip of parchment paper (it will make it easier to remove the pan after assembling and chilling).
-
Place one of the two choux pastry layers (ideally the one that is less puffed up) inside the ring. Spread the vanilla custard over the top evenly, and then top with the remaining layer of choux pastry.
-
Refrigerate for at least 1 hour but up to 3 hours to allow the filling to set. Remove the ring, peel off the parchment paper, and dust the top with powdered sugar before serving.
Notes
- As always, I recommend using a digital scale instead of measuring in volume with cups for the most accurate results, especially when baking.
- Store leftover Karpatka in the fridge for up to 3 days. Note that the longer you store it, the softer it will become so it’s best to eat it as fresh as possible.
- You cannot freeze fully assembled Karpatka. You can, however, freeze the baked choux pastry layers wrapped in plastic wrap and foil for up to 1 month. Thaw them overnight in the fridge and then refresh them in a 350°F (180°C) oven for about 8 to 10 minutes. Make the filling from scratch and assemble as directed.
- Although some people insist on whole milk for making pastry cream, I’ve been making pastry cream for over 20 years using whatever milk I have on hand (which is often low-fat). Use whatever milk you normally have in your fridge.
- If you don’t have a stand mixer or a hand mixer, you still can make Karpatka. For the pâte à choux, use a wooden spoon to vigorously mix the eggs into the dough. For the crème mousseline, whisk very vigorously by hand.
- Note that if your springform pans have a dark nonstick finish like mine, the edges of your choux pastry layers will brown more.
Nutrition
*All nutritional information is based on third-party calculations and should be considered estimates. Actual nutritional content will vary with brands used, measuring methods, portion sizes and more.*
ADVERTISEMENT

